The WLAN Pi with friend
Introduction
Updated
– 9/14/18 – Updated install image link and hardware kit info
– 3/9/18 – Updated wireless adapter information
I attended Keith Parson’s Wireless LAN Professionals Conference (WLPC) last week in Phoenix. I went to see what’s on the mind of folks who design and wrangle large Wi-Fi networks and equipment for a living and what the "front-of-mind" issues are.
My biggest takeaway during my three days in Phoenix was from the Real World Mobile WLAN Testing "deep dive" session hosted by Scott McDermott & Jerry Olla. The session was centered around getting to know a powerful little "Pi" dubbed the WLAN Pi. This is a NanoPi NEO2 loaded with a custom ARMBIAN image that includes a suite of networking tools useful for testing the performance of both wired and wireless networks.
The NEO2 is no wimpy little Pi. It’s based on an Allwinner H5, a quad core 64 bit Cortex A53 SoC, and includes USB 2.0 and Gigabit Ethernet ports (one each), micro SD card slot and either 512 MB or 1 GB of DDR3 RAM; all for $18 bucks!
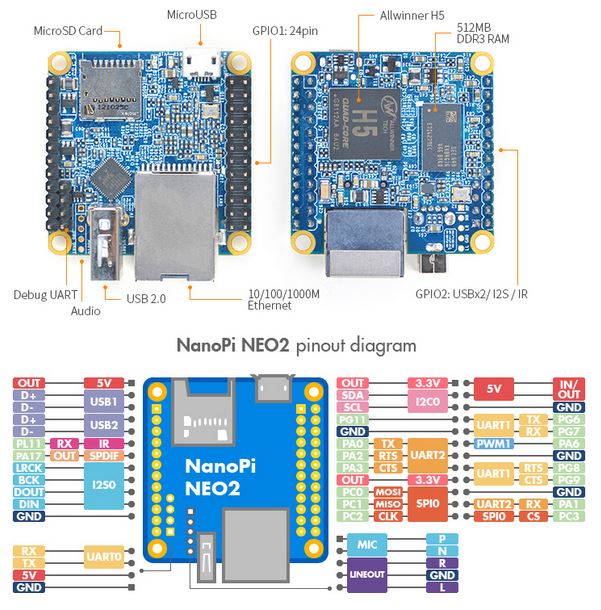
NanoPi NEO2
The WLAN Pi’s most surprising attribute is that it can take almost full advantage of its Gigabit Ethernet connection.
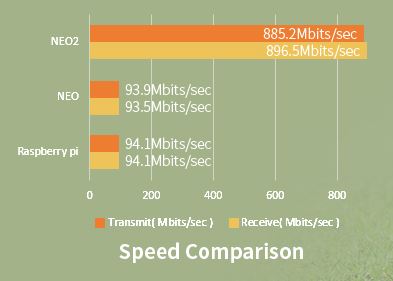
NanoPi NEO2 throughput
Fortunately, the NEO2 comes in a complete starter kit ($38) that’s not too hard to assemble. And when paired with an appropriate Wi-Fi adapter, it becomes a powerful Wi-Fi performance test tool.
Each of us in the deep dive session received an assembled NanoPi NEO2 and Comfast CF-912AC USB AC1200 adapter. This adapter uses a Realtek RTL8812AU chipset, so any of these other adapters should also work.
Updated 3/9/18: I noticed odd behavior in Kismet using the Comfast adapter. Basically, it looked like different SSIDs on the 2.4 and 5 GHz bands of the same AP were showing the same packets. This behavior was also seen using an Edimax EW-7811UTC 1×1 ac adapter, which also uses the Realtek RTL8812AU. Activity was also being seen on many channels that were not active.
Switching to a dual-band N adapter (Alfa AWUS051NHv2), that uses a Ralink RT3572 chipset yielded results that made much more sense. The ASUS USB-N53 also worked.
If you order the NEO2 starter kit direct from Friendly Elec ($38 + $5 China Post) and the Comfast adapter from Amazon ($20 and no shipping with Prime), you’ll be under $65 all in. If you opt for the 1 GB version of the NEO2 (that’s what our kit had), add $10 more. Either way, you’re well under $100.
Updated 9/14/18: The NEO2 starter kit is no longer available. The NanoPi NEO2-LTS board is the recommended substitute board. You’ll also need to order a NanoHat OLED, probably a case and 8 GB or larger Class 10 micro SDHC card. I’d also recommend upgrading to 1 GB of RAM.
The kit includes an 8 GB Class 10 micro SD card, but you’ll need to supply a USB "wall wart" power adapter or other source of USB power. If you need help putting everything together or getting it up and running, Jerry and Scott put most of what you need to know, including an assembly video, over on WLAN Pi.
Getting Started
The nice thing about WLAN Pi is that while it’s Linux-based, you can access many of its features via its web interface or Android apps. The WLAN Pi image, which you download, unzip and burn to the micro SD card that comes with the NanoPi NEO2 kit, has everything you need.
Networking utilities included in the image are:
- iperf
- iperf3
- zapd (Ruckus Wireless zap daemon)
- Ekahau eperf
- HTML 5 Speedtest (Javascript based)
- Kismet
- HORST
Also installed are perl (v5.24.1) and python (2.7.13), which come in handy if you get into coding. And if you want to add other packages, you can log in via SSH and run apt-get install.
WLAN Pi comes set up to grab an IP address from your LAN’s DHCP server when you connect it via Ethernet. The leased IP will be shown on the OLED screen. (Yours will be different and match your LAN’s subnet range.)
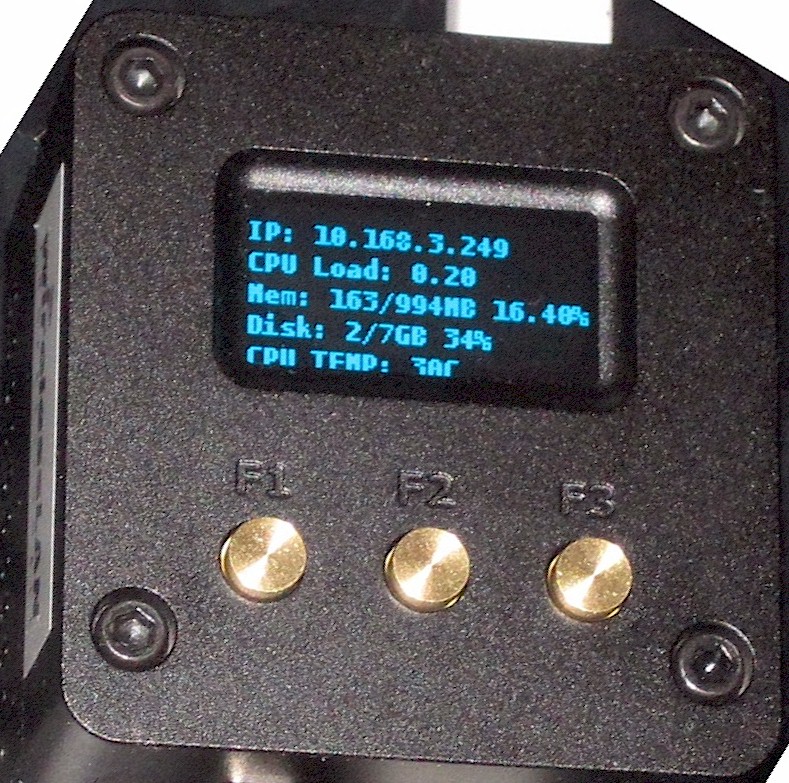
WLAN Pi OLED showing leased IP address
Just enter the IP address shown in the OLED screen into your browser and you should see the screen below.
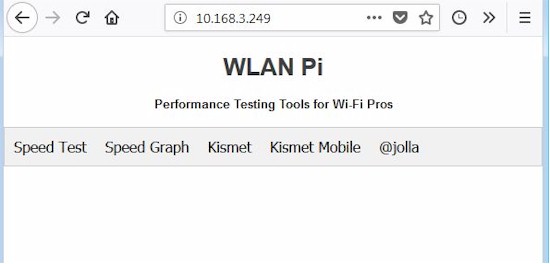
WLAN Pi Home screen
HTML5 Speed Test
Federico Dossena’s Javascript-based HTML5 Speedtest can be run two ways. The Speed Test menu launches the speedometer-style display shown below. To show the value of this test, the two tests below show results from an Ubuntu 16.04 LTS system with an Intel i5 3570 processor and TP-Link TG-346 PCIe gigabit NIC on the left and Windows 7 system with an Intel i5-2500 and Intel 82579LM onboard NIC on the right.
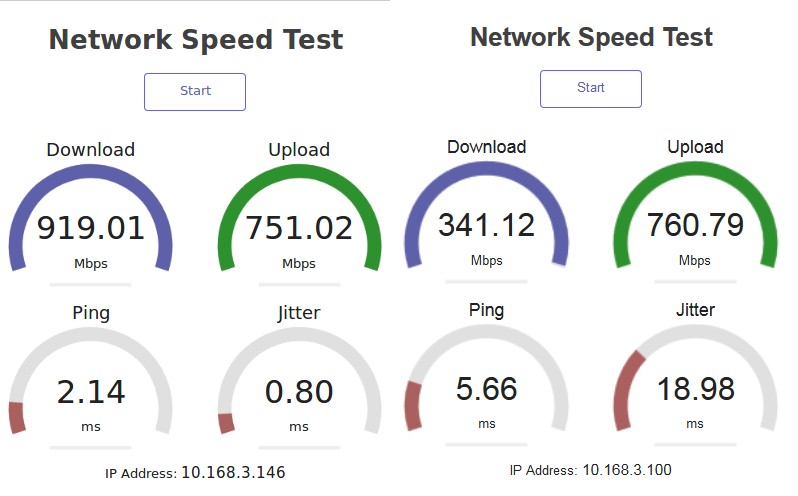
HTML5 speedtest results
Selecting the Speed Graph menu runs the same tests, plotting them vs. time.
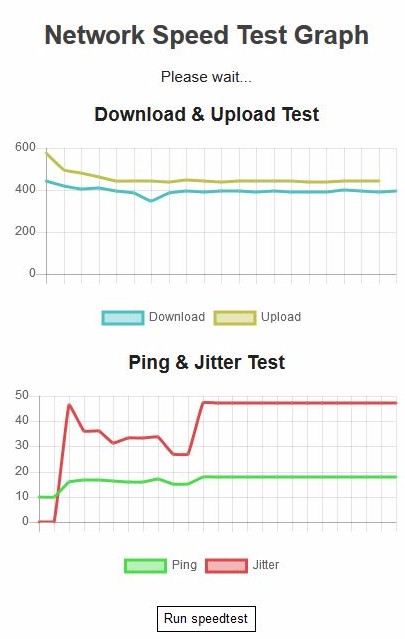
HTML5 speedtest graph
Both tests are run with defaults, which run a 15 second test in each direction. HTML5 speedtest allows for optional parameters to be passed to modify test settings, but that isn’t implemented in WLAN Pi.
Closing Thoughts
There is much more that WLAN Pi can do, including the ability to see how busy your neighbors’ pesky wireless networks are. Next time we’ll show you how to do this!
