Introduction

We’ve always had a server in a our home and it’s varied from being a powerful energy hungry server, to a Virtual Machine on a powerful energy-hungry server, to a mildly energy-hungry server on an older PC, to a decently powerful laptop (don’t laugh, it has built-in UPS and low power usage).
Each had its advantages as well as disadvantages. However, I figured with a little thought, I could sit down and put together an adequate server that was easy on the pocketbook, low on energy and noise, yet still powerful enough for most tasks.
To put together a build list, I needed to know what was most important to me. Noise was a key consideration. I wanted to get away from lots of fans in this build, since I didn’t want our house sounding like a datacenter anymore. So this requirement dictated the need for low power usage.
Things that were not important to me were expandability and storage space because I have a pair of Synology NASes that handle backups and other tasks for our home. I also didn’t need a large amount of CPU power, since this box wouldn’t be doing things such as transcoding media or running CPU-hungry apps. Finally, I wanted to keep the system footprint pretty small, as my network closet is not large, by any means.
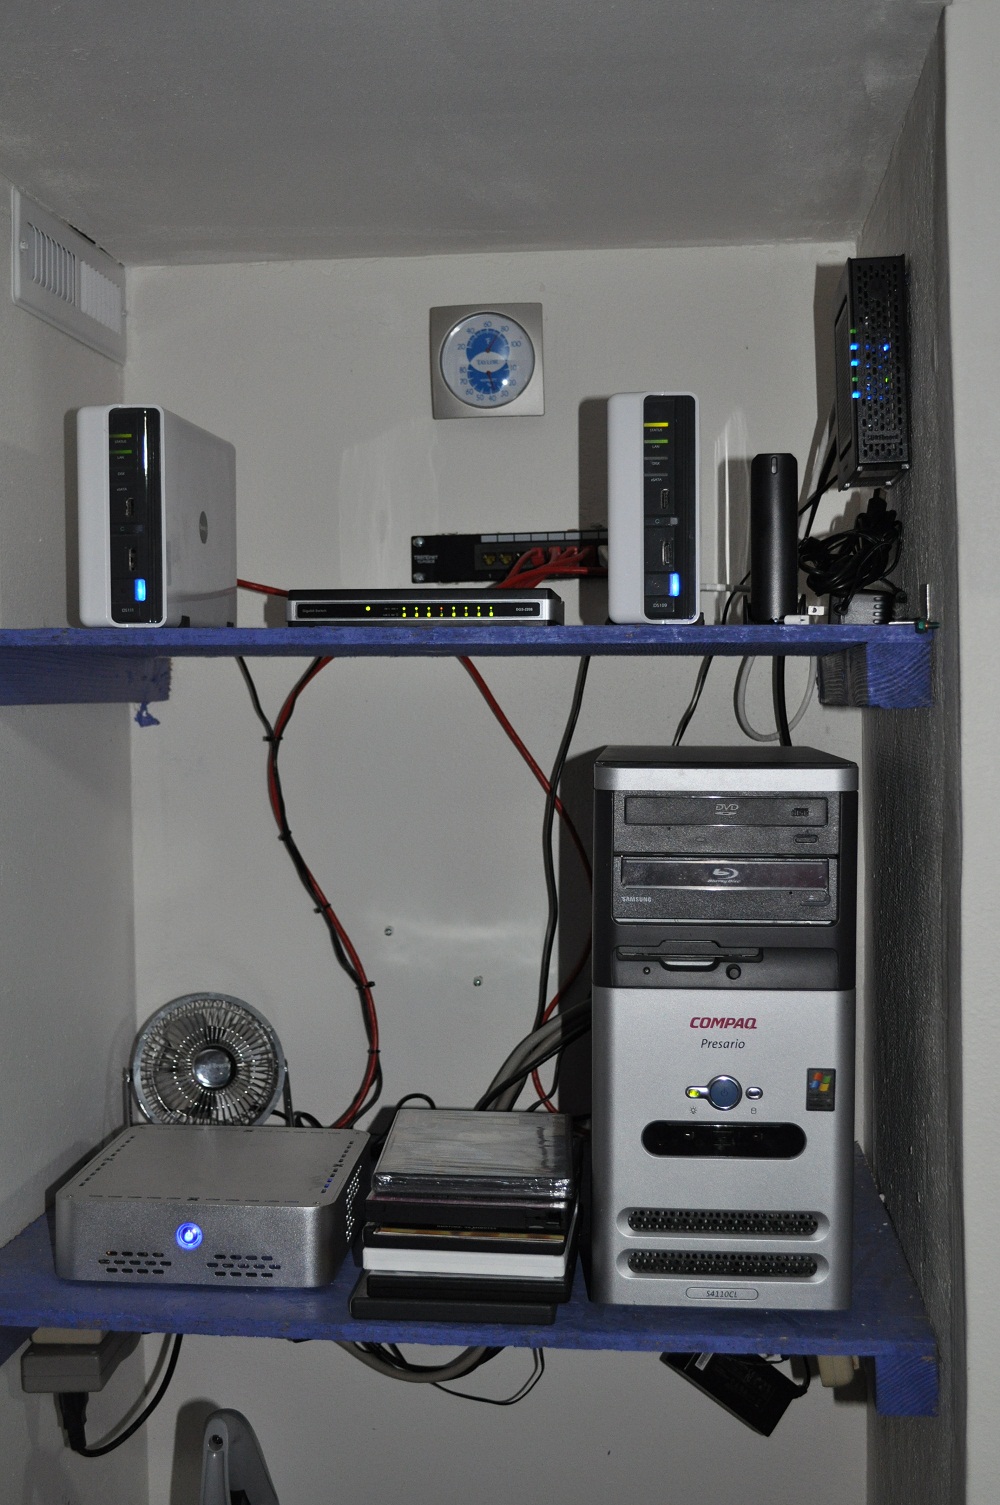
Ultimately, I decided on Habey’s EMC-600S mini-ITX case (shown above) for its size and appearance. The case size and my other design requirements pointed me toward an Atom-based motherboard/CPU/VGA combo as the heart of my system. Once that was decided, it was a no brainer to go with the Intel BOXD525MW Atom D525 dual core board, with the final selling point being its use of SO-DIMMS vs. standard DIMMs, as space was going to be tight.
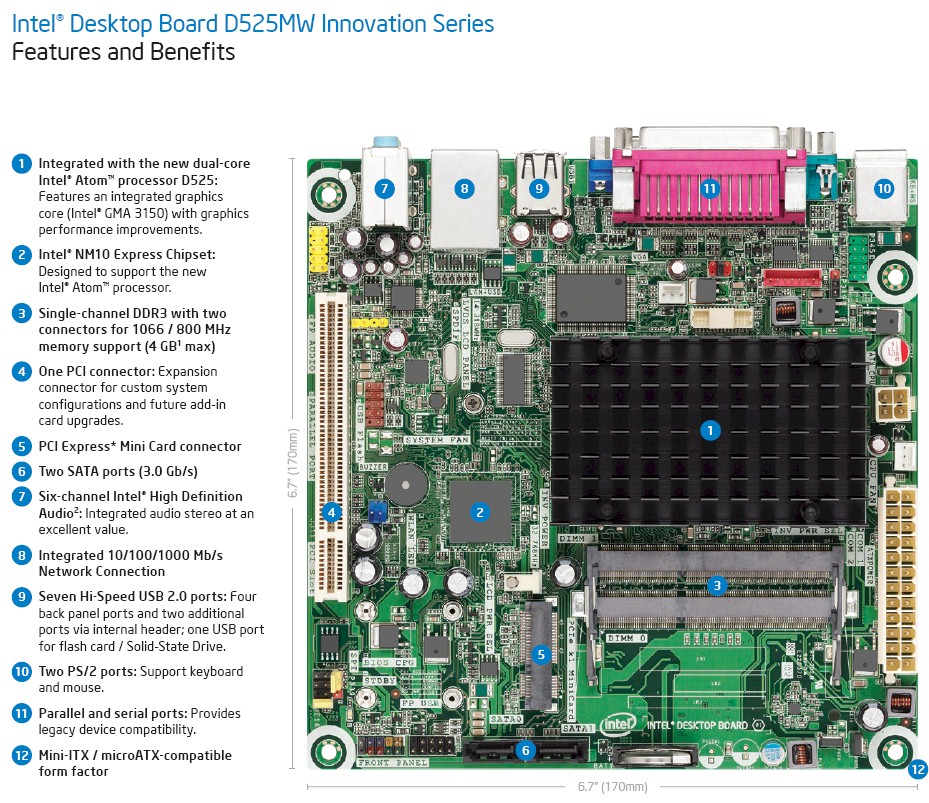
Figure 1: Intel BOXD525MW Atom D525 dual core board
I had done a fair amount of research on the Habey case. Even though the specs claimed it could house a 3.5″ drive, from the experience of other reviewers, I knew that it would be a tight fit, if it fit at all. For that reason, and the fact that storage space wasn’t a priority, I picked up a Seagate Momentus 7200.4 320 GB 7200RPM 2.5″ laptop drive to complement the rest of the build, figuring it would be slightly easier on power as well. I also ordered a 50mm Evercool fan, as the case had room for one fan and everything else was passively cooled.
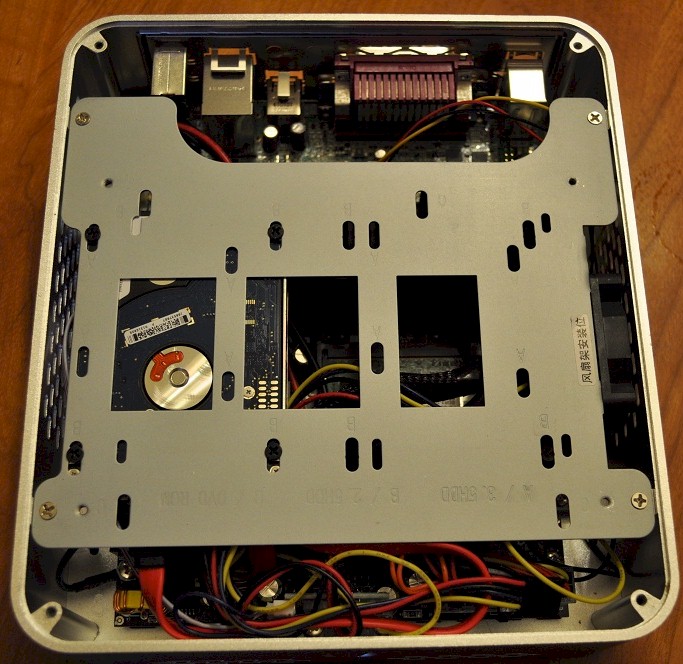
Figure 2: Habey case with top off, fitting a 3.5in drive would be tight!
The Build
The Habey case is solid 3mm aluminum and could probably survive getting dropped off the top of a building, run over by an SUV, and then trampled by a herd of hungry elephants. But space inside the Habey is at a premium and everything is very tight in there.
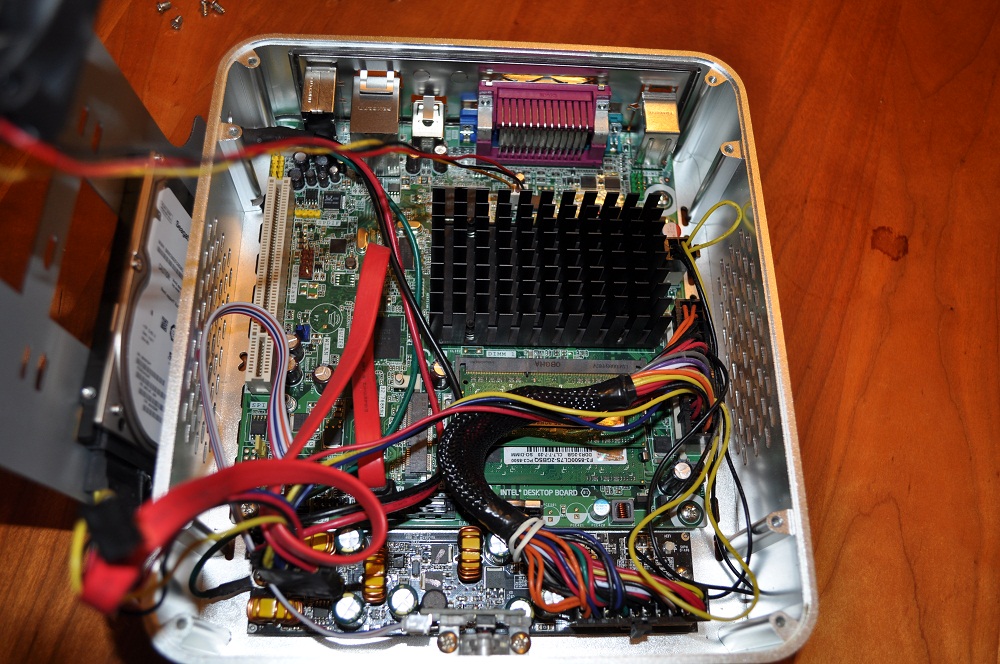
Figure 3: The interior of the low power server
In the picture above, you can see the motherboard tucked in with the Habey power supply in front of it, which is tiny and fanless. I had the choice of blowing the fan into the case or out. I chose in and that seems to have worked well. Note that the fan isn’t shown in Figure 3, but you can see it on the right side of the photo in Figure 2.
Routing cables nearly required tweezers and at a few points I considered asking our two year old to come try some connections because my hands seemed too large. I was glad I chose a motherboard with SO-DIMMS and the 2.5″ drive when it came down to putting it all together.
Since I have no CD drive, I was planning on hooking up a USB CD-ROM drive and installing Windows Server 2003 that way. I know, being a home network geek I should be installing Linux. But I really like Windows and feel it better suits the way I use the server.
My present home server (running on the dual core laptop) was nearby, so I thought I’d try a little experiment before starting on a fresh install. I installed CloneZilla to a LiveUSB and copied the laptop drive image over to my Synology NAS. I then moved the LiveUSB to my new server, booted up, and copied the image to this drive. A few minutes later I booted up, reactivated Windows and my new home server was ready, with all my old configuration and software. Sometimes laziness pays off!
In Use
At this point, the benefits of this build were only theoretical. I needed to hook up a Kill A Watt power meter to see if I was successful on the low power requirement. The Kill A Watt registered 19 W, which I judge as success. The server also seemed to be handling the load of everything I needed it for just fine, which was also a good sign.
I didn’t expect this server to be a screamer when it came to file transfer. Sure, pushing Gigabit speeds doesn’t require much from today’s CPUs. But it’s running a laptop drive (albeit a 7200 RPM drive) and it has a Realtek NIC (on an Intel board). Realtek NICs are often cited as problematic in some open source router builds.
To test, I fired up LAN Speed Test Server on a quadcore desktop (running 64-bit Windows 7 and also using a Realtek NIC) and ran some tests. LAN Speed Test uses SMB file sharing for calculation of transfer speeds and has been reported as slightly to significantly slower than the IxChariot tests Tim uses.
Running across a Gigabit network that also has some constant IP camera traffic, the new server was able to write at 766 Mbps (96 MB/s) and read at 408 Mbps (51 MB/s). Not bad, and very reasonable for a server whose main function will not be file serving.
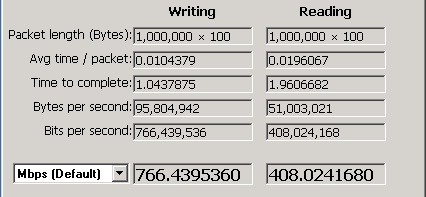
Figure 4: File transfer speed as reported by LAN Speed Test
A few days into the build, the internet started becoming unavailable. Since the new server handles DNS and DHCP requests (although all clients have a secondary of Google DNS), I immediately suspected the new server wasn’t stable. Sure enough, it was crashing on a regular basis. My CloneZilla experiment was definitely suspect, but I needed to be sure. Fortunately, Intel released a BIOS update a few days later that solved the problem and the server has been completely stable since.
By the way, these are the functions I use our low power home server for:
- DNS Server
- DHCP server
- Script server for my simple bat files
- Active Directory server (user accounts, group policy, logon scripts)
- Squeezeplay client
- Dynamic DNS notification to me of WAN IP address changing
- LAN Speed Test server
- Print server (for XP clients which otherwise need software to access the printer directly)
- Remote Desktop host for logging in from work (port changed for security by obscurity)
- Alternate library for Squeezecenter
- YAMMM for management of DVD metadata on the Vortexbox
Cost and Component List
Final price was $224.32 at the time I built it. All things considered, not too bad for a nice new server that can handle any tasks I need it for. Here’s the costed parts list.
- Habey EMC-600S case – $52.99
- Seagate Momentus 7200.4 ST9320423AS 320GB 2.5″ drive (before drive prices increased) – $49.99
- Evercool FAN-EC5010M12CA 50mm fan – $4.99
- Intel BOXD525MW motherboard – $84.99
- 2 x G.SKILL 2 GB memory DDR3 1066 (PC3 8500) Model F3-8500CL7S-2GBSQ – $25.98
- Shipping – $5.38
Note that this does not include the Windows Server 2003 license, which I reused from my previous server. If I were buying this new, today, it would be Windows Server 2008 Standard, 64 bit, which NewEgg lists for $730.
Closing Thoughts
I feel my low power home server build is a success. It frees up the laptop for other uses and takes significantly less power than its desktop predecessors. I achieved the goal of having low power usage, low noise, and a small footprint, all for a reasonable hardware cost. It is also very stable and fits nicely in to my network closet, leaving room for other projects.
