
| At a Glance | |
|---|---|
| Product | AXID M1054 Network camera [Website] |
| Summary | Prosumer HD network camera with two-way audio, PoE and night vision |
| Pros | • Wealth of features • Solid construction • Built-in two-way audio • Night vision is in color and very clear |
| Cons | • Night vision can’t be triggered by low light level • Pricey compared to other “HD” netcams |
Introduction
Did you know Axis invented the network camera back in 1996? When I first started working with IP cameras I didn’t. As I’ve worked with more and more vendors I’ve come to take note of the large range of features and usability that run the gamut from very basic to very detailed. Taking pictures is just one small portion of what sets one network camera apart from another. Just as important are the features and the functions that are supported
For this review, we’ll be looking at AXIS’ M1054 camera. You can think of the M1054 as either the top end (and most expensive) of Axis’ "smallest and smartest" M10 series, or the next-to-least expensive model in its HDTV/Megapixel netcam family. The M1014 entry-level HD netcam, which should be shipping soon, lists at $229 and shares many of the M1054’s features, including 720p resolution.
The M1054 can be purchased for around $389 if you check around online. It’s more expensive than some of the other network cameras we’ve looked at. But once we get into features, you may find it’s worth it. A follow-up review will showcase the differences between the M1054 and the next model down, the M1031-W. In the meantime, check the M10 series spec and feature summary below.
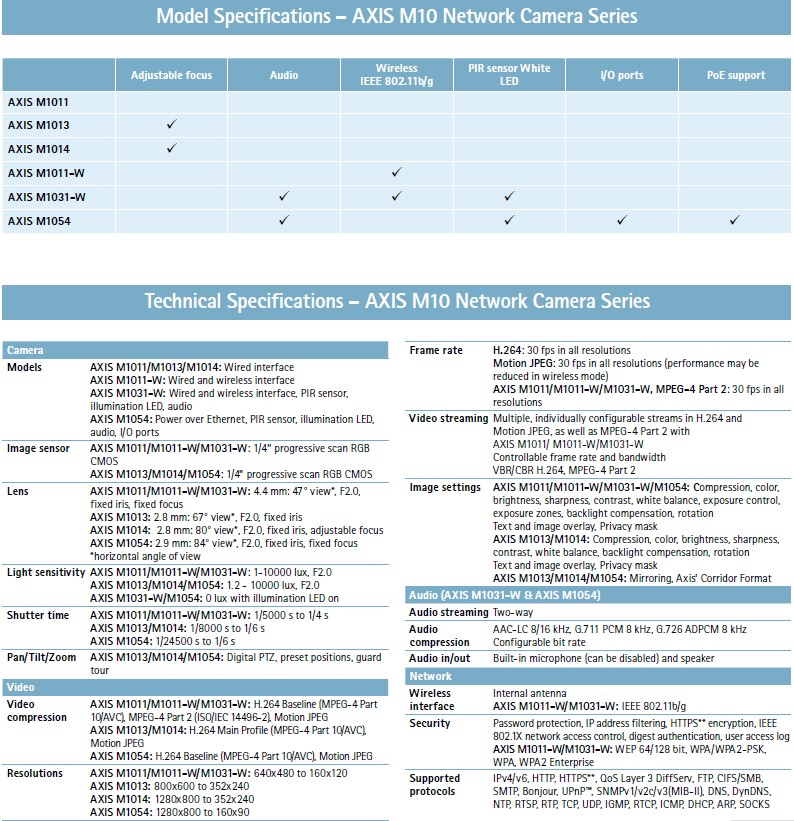
AXIS M10 series
Setup
Opening the M1054 box, I found a manual, software CD, the camera, a power supply and several mounting accessories, including a wire clip. I’ve mentioned the lack of a wire clip on other reviews, so that was nice to have.
Setup of the Axis M1054 was very easy. I simply plugged it into my network and then found the IP address with Overlook Fing on my Android phone. The first time accessing the camera’s web interface required an admin password be set. From there, I simply proceeded to the front page Live View of the camera, which is shown below in Figure 1. The Setup tab within the camera was also available here and lets you into the guts of configuring the camera for different functions. When it comes to features, there are a lot of them, which we’ll get into later.
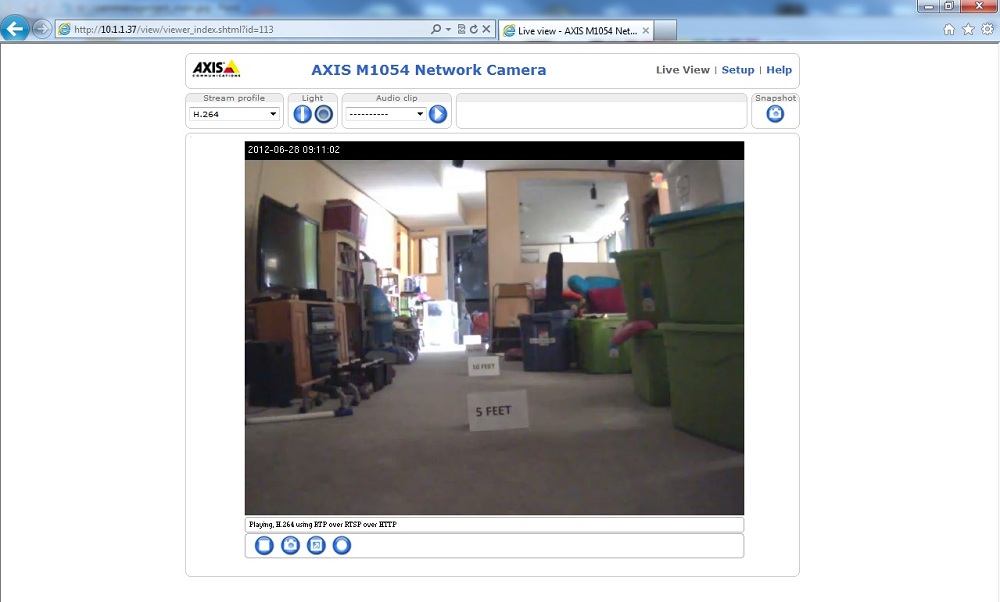
Figure 1: AXIS M1054 Live View
The M1054 came to me courtesy of Iomega, so that I could review the video surveillance features in its new ix2-dl NAS. Since they sent three cameras, I decided to install the AXIS Camera Management software to see how it handled multi-camera management. The AXIS Camera Management software allows you to configure multiple cameras, manage firmware updates on multiple cameras, configure user accounts, check and configure IP addresses and just generally check the status of any AXIS cameras on your network.
In Figure 2 I’ve highlighted the Properties display of one camera within the AXIS Camera Management software. IP address info can also be found and adjusted here.
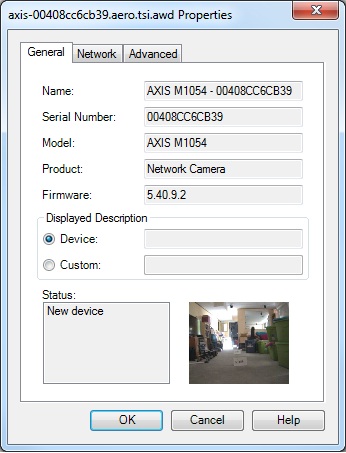
Figure 2: AXIS Camera Management software Camera Properties display
The AXIS Camera Management software was great for configuring multiple cameras all at once. But I felt going to each camera’s own setup page was best for really figuring things out, reading help and working on something I didn’t necessarily understand.
Figure 3 shows the configuration page of the AXIS Camera Management software, you can see it takes a no-frills approach. Changes can be quickly made, but it’s not very user-friendly.
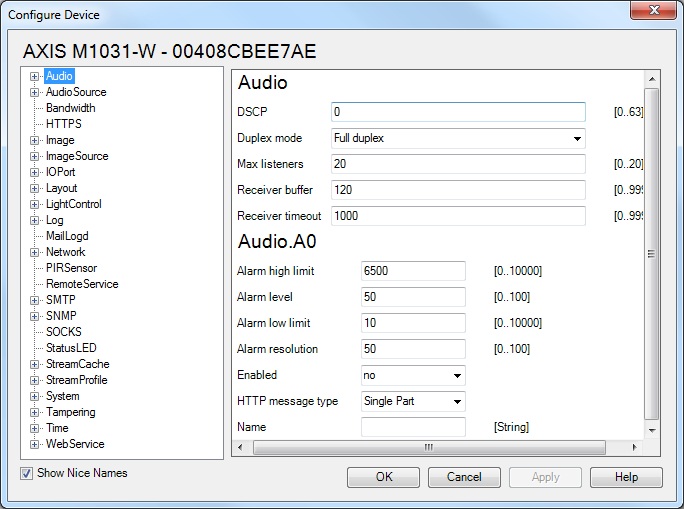
Figure 3: AXIS Camera Management Device Configuration
Figure 4 below shows the AXIS Camera Management main screen, where templates can be applied to all cameras, firmware can be upgraded, user accounts can be created and modified, etc.

Figure 4: AXIS Camera Management software main page
Inside
Because the M1054 camera was a loaner, I didn’t want to get too aggressive in pulling it apart for pictures, so there aren’t any. However, Axis’ specs state that the M1054 uses its own proprietary ARTPEC-3 processor (short Axis whitepaper) and has 128 MB of RAM and 128 MB of flash.
The M1054 can be powered by its supplied 5VDC wall-wart, or you can ditch the power cord and use Power over Ethernet (802.3af). Obviously, you need a PoE injector or PoE-enabled switch to make that happen, but it’s a nice option. The M1054 does not have built-in wireless networking, while the M1031-W does.
The image sensor within the M1054 is a 1/4″ progressive scan RGB CMOS, whereas the lens is a 2.9mm, 84deg view, fixed iris and fixed focus lens. By comparison, the ZyXEL IPC-4605N we last reviewed had a 60deg horizontal view lens. The Axis M1054 will have a wider viewing area, although the ZyXEL camera can pan and tilt the lens to see more field of view overall.
The PIR (passive infrared) sensor is good for up to 6 meters and is used for motion detection at night. The lens needs 0 lux when the 1W illumination LED is on, which can be triggered via a PIR action rule.
The camera also includes a speaker and microphone, which work well for two-way audio communication. There is also an I/O terminal connector that can really expand the capabilities of the camera. The digital output can be used to activate external devices upon event trigger, whereas the digital input can signal the camera to take action when an external stimulus is received.
Examples of external stimuli include door/window contacts, glass break detectors, etc. I can foresee a lot of uses for the I/O terminal connector, even though I didn’t test it out. Figure 5 below shows all the connectors of the M1054.
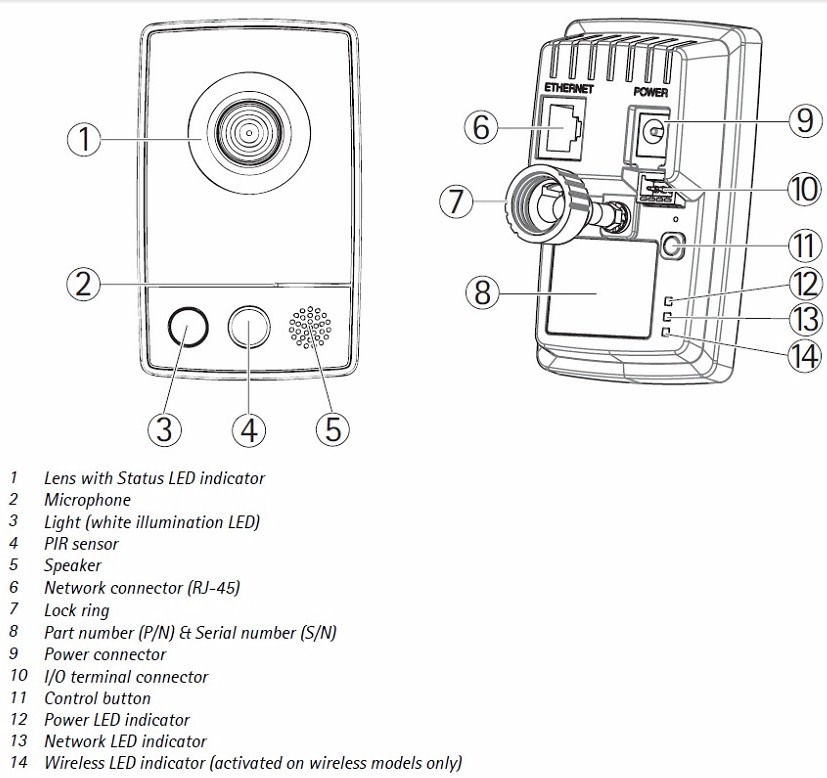
Figure 5: The connections of the AXIS M1054
Features
The AXIS M1054 has a wealth of features, many of which I found to be very well executed. Before we get into the meat of the Admin interface, I’ll list out a few of the features.
- Resolutions from 160×90 to 1280×800.
- Framerate of 30fps in all resolutions including H.264 and MJPEG formats
- Multiple, individually configurable video streams
- Image settings including compression, color, brightness, sharpness, contrast, white balance, exposure control, exposure zones, backlight compensation, fine tuning of behavior at low light, rotation, text and image overlay, privacy mask and mirroring
- Two way audio
- Security options including IP address filtering, HTTPS encryption, digest authentication and a user access log
- Supported protocols IPv4/v6, HTTP, HTTPS**, QoS Layer 3 DiffServ, FTP, SMTP, Bonjour, UPnP, SNMPv1/v2c/v3(MIB-II), DNS, DynDNS, NTP,RTSP, RTP, TCP, UDP, IGMP, RTCP, ICMP, DHCP, ARP, SOCKS
- Open API for software integration, including the ONVIF specification
- Motion detection, audio detection and tamper protection
- Many highly customizable alarm events and actions
In Use
I have to admit, I had a lot of fun reviewing the M1054. It has a whole lot of features, most of which are pretty easy to figure out as you sit in front of them. Some of the features include options I’ve complained about other cameras not having in past interviews.
A great example of this is Figure 6 below. You can see that motion detection window can be set and activity “noise” can be viewed in a timeline across the bottom right of the screen. Adjusting the sliders lowers or raises the Activity bar so you can know just what type of activity is going to trigger your motion detection event and exactly where you need to be set to capture that kind of motion. This is a much better method than the sensitivity number approach used by less expensive cameras that requires a trial-and-error setting approach.
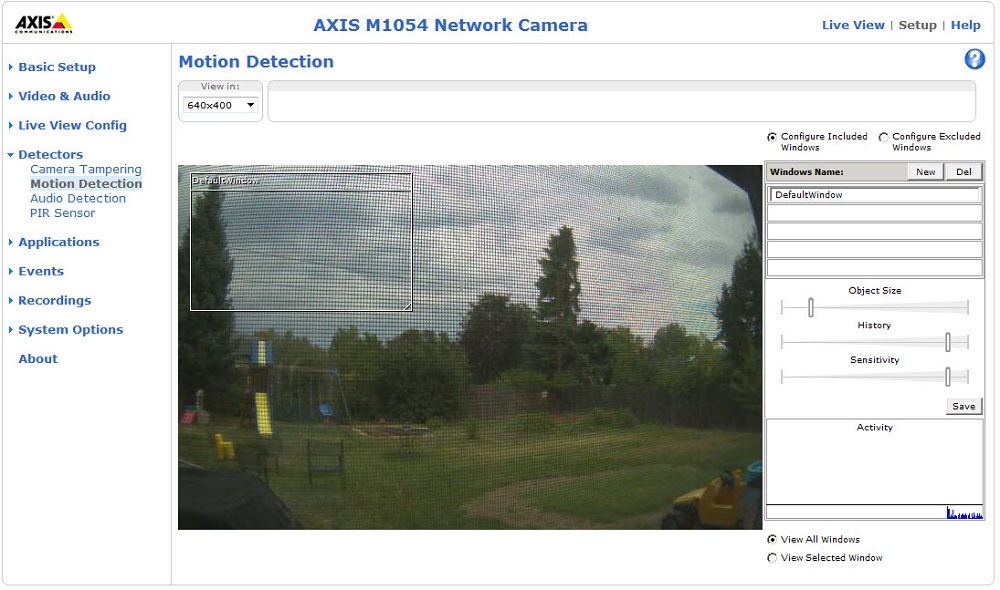
Figure 6: Motion Detection configuration of the AXIS M1054
Privacy Masks can also be set up to block out certain parts of the image in case there is anything that the camera operator should not be seeing. Overlays can be added to the image including date and time, text, or a logo/image.
The M1054 deviates from other cameras I’ve tested in that it has no IR LEDs. Instead, it uses a 1W white LED that you can trigger on specific events. We’ll see in the next section how this affects image quality in the dark. But I should mention that in order to have a visible image at night, the bright light needs to be on, which isn’t suited for inobtrusive monitoring. The light can be triggered in various ways, by motion on the PIR (passive infrared) sensor, audio detection, schedule or externally by input on the I/O connector.
The PIR sensor uses passive infrared technology to detect motion at night within a 6 M range. In my testing I set an Action Rule to trigger the LED on PIR motion detection so I could easily see when it tripped. I then had it email me 10 images of what it saw. Initially, my tests involved flapping my arms wildly in the dark to see when the light came on. But I later switched to adding a sound clip for the camera to play on PIR activation, in a failed attempt to scare our cat.
My unofficial tests found the PIR sensor worked reliably at a range of about 8 feet, but your mileage may vary. Figure 7 below shows the Action Rules I set when testing the PIR sensor.
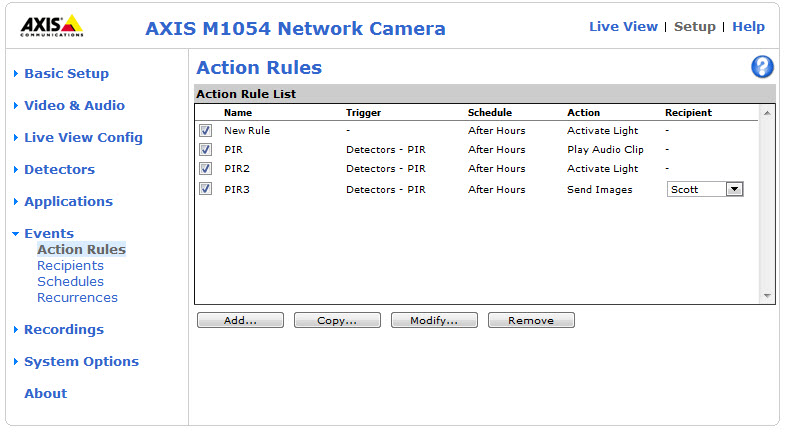
Figure 7: An example set of Action Rules
The M1054 can record to a network share, either on a continuous or action rule basis. You can set it to remove recordings older than a time specified and you can view recordings it has done to the share right on the camera’s web interface. Additionally, in the case of Action Rules, you can have images and/or notification sent to you via email in the case of trigger activation. Figure 8 below shows a configured network share.
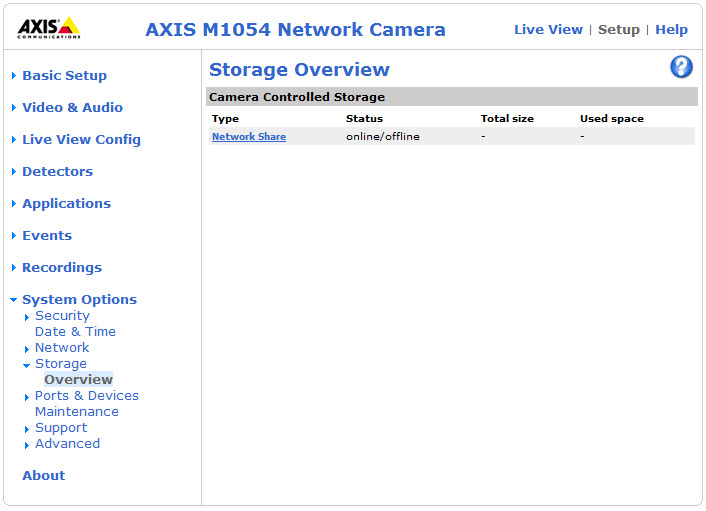
Figure 8: A configured network share
Action Rules for events were very customizable allowing for an almost endless amount of configuration options and notifications. With a little time and ambition I couldn’t really think of any situation that I couldn’t notify on. Trigger examples included storage being full, restarts, connectivity lost (admittedly not tested), PTZ moving (if this camera were to have it), time, input from the I/O connector, and the various detectors (audio, motion, PIR, and tamper).
Action Types included activating the light, using the I/O output port, playing an audio clip, recording video, sending images, sending notifications, and working the Status LED. Each of those various actions then had a subset of actions. Figure 9 below shows an example of a few options of the Action Rules screen.
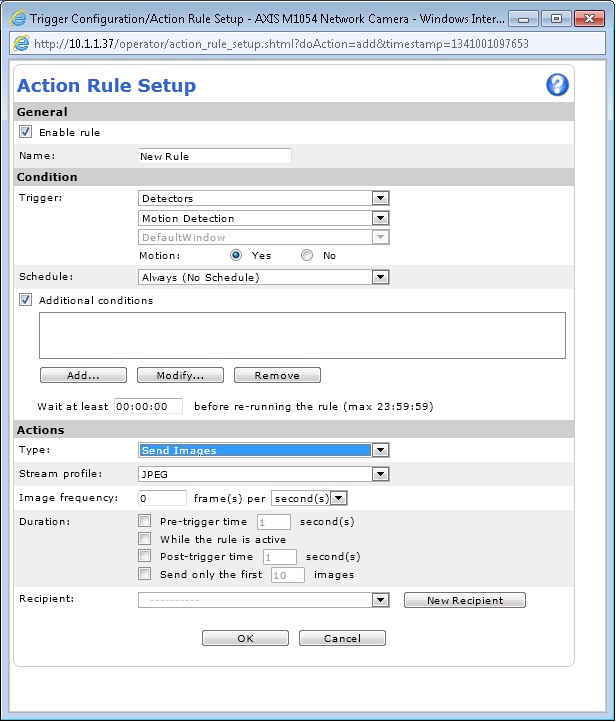
Figure 9: Some examples of Action Rule configuration
With everything this camera can do, it only makes sense that you would want to know what’s going on. The camera’s web interface includes a very comprehensive and useful set of logs and reports for doing just that. Figure 10 below shows the many things that can be reported on.
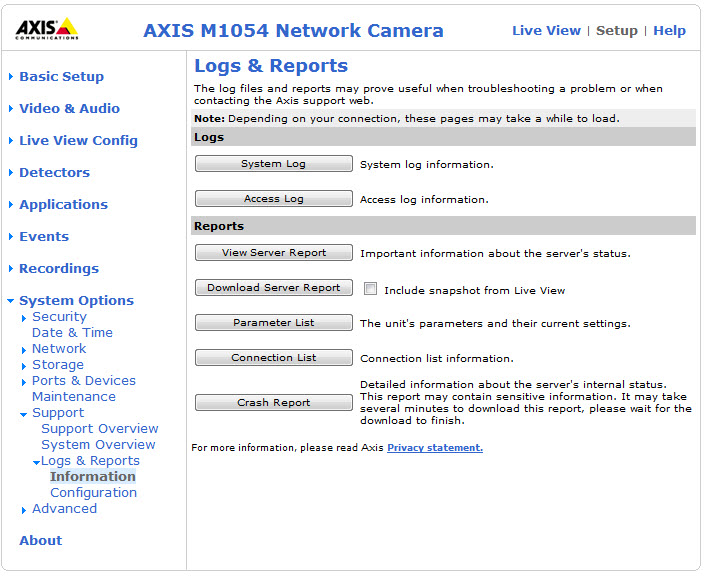
Figure 10: Reporting function of the M1054
The complete screen captures of the M1054 admin screens can be seen in the gallery below.

Live View

Basic Setup

Tab to configure user access

Tab for configuration of TCP options

Tab for configuration of time and date settings

Tab for configuration of video streams

Tab to configure audio settings

Tab for configuration of video streams

Tab for configuring individual streams

Camera Settings

Tab allowing an image to be overlayed on the picture

Configure an unseen private area here

Tab to configure audio settings

Tab for configuration of audio clips

Tab to customize your Live View

Configure what constitutes tampering

Set up detection windows and sensitivity here

Configure audio detection here

Configure the sensitivity of the passive infrared sensor here

Set up ONVIF apps here

Create and configure Action Rules

Set up Alert recipients

Customize schedules

Set up repeating actions

See recordings

Set up continuous recording

Tab to configure user access

Allow or deny IP addresses

Configuration options for HTTPS

Configuration options for IEEE 802.1X

Enable and disable audio support

Tab for configuration of time and date settings

Tab for configuration of TCP options

Advanced TCP/IP settings

Configuration for SOCKS

QoS configuration

Configuration of email options

Configuration of SNMP monitoring options

Enable or disable UPnP

RTP configuration

Enable and disable Bonjour

See configured storage

Configure IO ports

Enable or disable the status LED

Status of ports

Tab for common admin tasks

Intro to support section

Quick look at entire system status

Quick reference for all logs and reports

build information

Set log file parameters

Powerful scripting options for customization

Web file upload for customization

Another option

About the camera page
Image Quality
For the image quality comparison, I used a modified setup close to the one I have been using for all of the camera reviews. This consists of a control daylight image in our junk room with a Nikon D5000 DSLR. The new twist is that I now have markers set up at 5 feet, 10 feet, 15 feet, and 20 feet instead of just one at 20 feet. For comparison’s sake I’ll also include the snapshots from the ZyXEL IPC-4605N, which was our last camera review with probably the best picture quality I’ve seen to date.
Figure 11 is the Nikon D5000 DSLR reference shot.
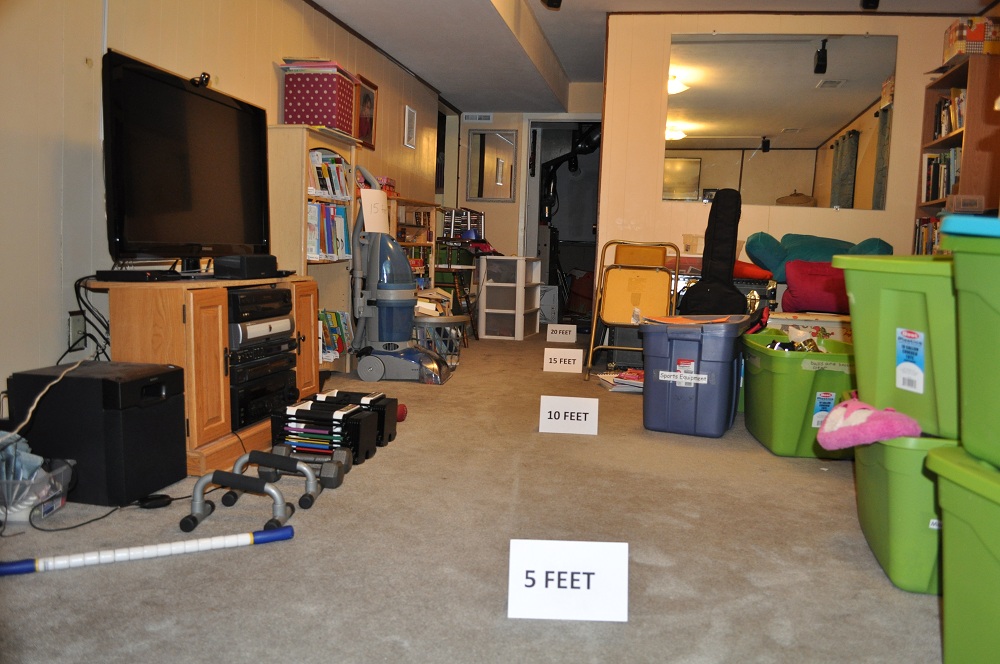
Figure 11: Control image from the Nikon D5000 DSLR
Figure 12 is the Axis M1054.
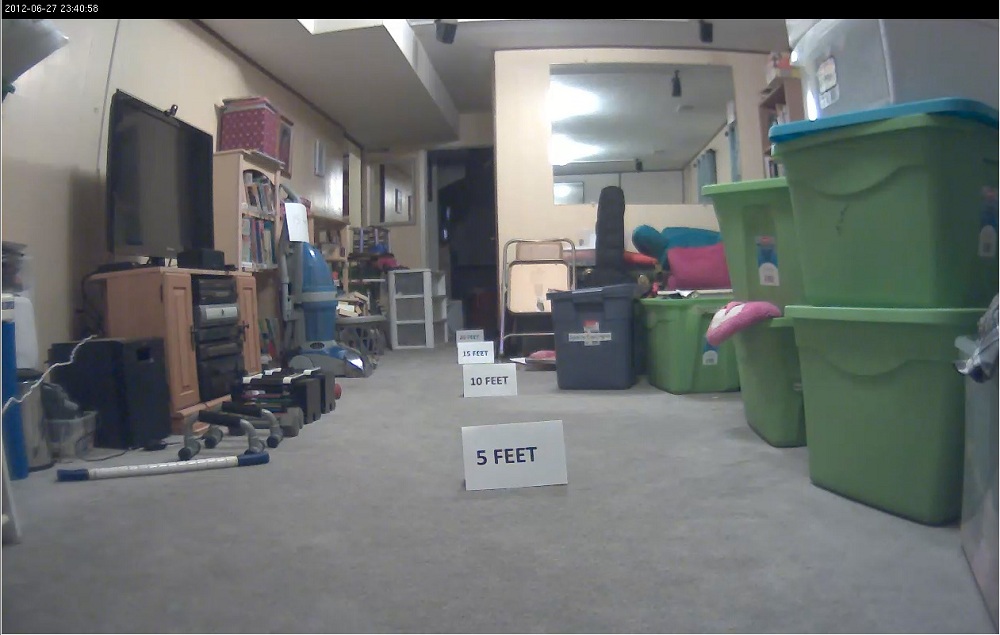
Figure 12: Day image from the Axis M1054
Figure 13 is the ZyXEL IPC-4605N for daylight comparison.
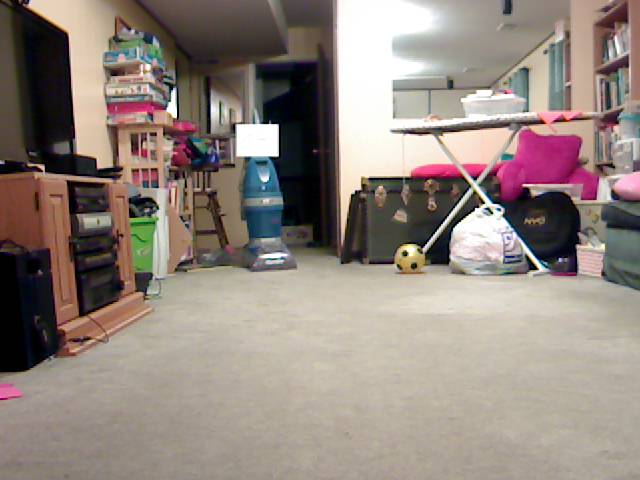
Figure 13: Comparison day image from the ZyXEL IPC-4605N
The layout of the junk room is ever evolving, so some components of comparison with the ZyXEL will be difficult to quantify. At close range to 15 feet, the lettering on the markers is clearly visible. At 20 feet you can still make it out since we know what it says. However, the M1054 does have ok penetration back through the doorway beyond the 20 foot marker, a little more clearer than the ZyXEL. The daylight clarity of the M1054 is very good.
When we move on to night vision I need to preface the pictures by mentioning again that the M1054 uses a white LED vs. IR LEDs for low light use. The effect, as you will see in the following pictures, is dramatic. The resulting picture is in color and everything is very clear up to the 10 foot mark. It’s unfortunate that my old testing protocol did not have the 5 foot markers as it would have been interesting to see clarity of the ZyXEL camera with the markers. The IR LEDs, while not providing color, seem to create a more compelling image, as you will see in the images below.
Figure 14 is the Axis M1054 night vision.
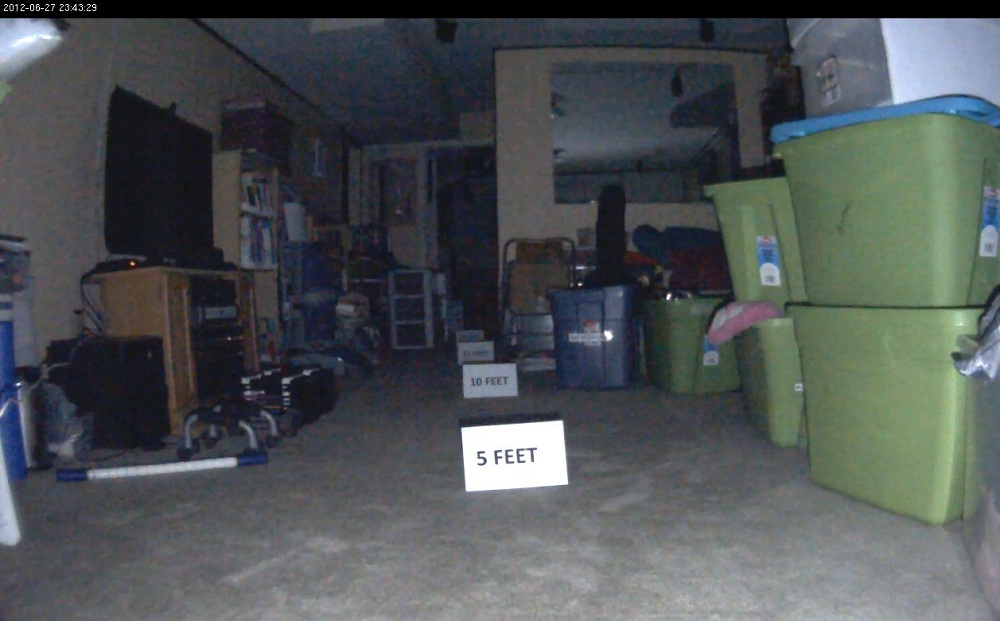
Figure 14: Night image from the Axis M1054
Figure 15 is the ZyXEL IPC-4605N night vision comparison.
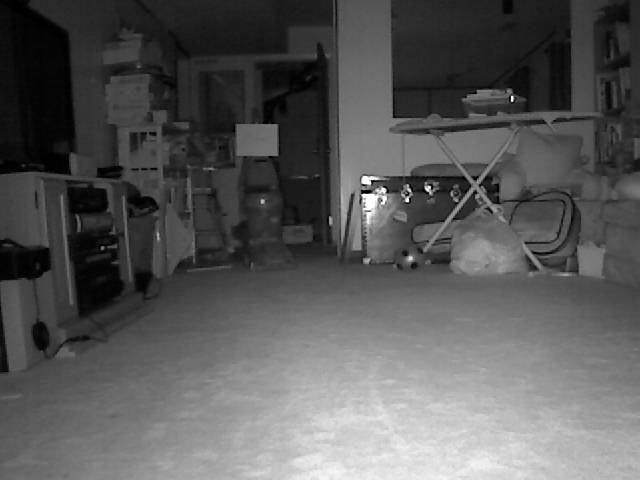
Figure 15: Comparison night image from the ZyXEL IPC-4605N
One caveat, as mentioned earlier, is how you plan to use your camera. At night, cameras with IR LEDs will enable them when light gets down to a certain level. This also causes the annoying click on, click off that we sometimes get when the light meter is right on the edge of useable light. For something like a quick check of your home’s netcam, IR is the way to go. You can clearly see the camera’s field of vision without having to interact with the camera’s controls.
With the M1054, you have to turn on its light if you want to see in the dark. I didn’t find any way to have it automatically come on at night. You can, however, have the light illuminate automatically for different events, such as motion detected by the PIR (Passive Infrared) sensor, audio detection, or even by time. But nothing I found could turn the camera light on in response to low room light. In an office situation, it may make sense to have the bright LED come on after hours anyway. With that said, the M1054 had an excellent picture with just a small amount of light from another room, compared to some other cameras I’ve used.
As a last check, I loaded the camera in to Blue Iris to capture the measured framerate. In the H.264 stream I saw a consistent 30fps for the M1054. This is very good and should capture very useable video in a motion detection situation.
Closing Thoughts
At close to $400, the AXIS M1054 is much more expensive than other cameras we’ve reviewed. But the old saying that "you get what you pay for" certainly applies here. The camera features, bundled AXIS software options and image quality make the M1054 well worth the extra money.
